Showing posts with label Home Assistant. Show all posts

Monday, December 23, 2024

Mastering Matter: Seamless Smart Home Integration with Network Segmentation

I’ve been intrigued by the idea of integrating devices with Matter for some time. My smart home setup includes a pair of SwitchBot Hubs, some Govee lights, and an air purifier. Each of these devices comes with its own dedicated app, and while some offer integration with Home Assistant, the process often comes with limitations—such as requiring devices to be connected to the main network.

The primary reason I hadn’t yet migrated these devices to Matter was my desire to maintain network separation for IoT devices, even when using Matter.

Network Segmentation Challenges

Previously, I set up an IoT VLAN where devices on this virtual network are isolated from the main network. Devices like my phone, computer, and Home Assistant server, which are on the main network, can still access the IoT VLAN. However, this setup presented a few hurdles for Matter integration:

  1. IPv6 Requirement: I hadn’t enabled IPv6 on the IoT VLAN to reduce the attack surface for potential network threats. Unfortunately, Matter requires IPv6 for communication, so enabling it became a necessity.

  2. Local Network Limitation: Home Assistant’s Matter implementation only scans the local network for devices. Since my Home Assistant server resides on the main network, it couldn’t detect Matter devices located on the IoT VLAN.

First Attempt and Challenges

I explored solutions, including this guide on setting up Home Assistant across multiple VLANs. While I managed to connect Matter devices to Home Assistant, this configuration caused my non-Matter devices to become unavailable. Upon inspection, I realized that Home Assistant had designated the IoT VLAN as its default network. This occurred because Home Assistant appears to sort networks by IP subnet, and my IoT VLAN (10.0.15.0/24) was prioritized over my main network (172.16.1.1/24).

Given that the IoT VLAN blocks connections to other networks, this default setting broke many of my integrations. Frustrated, I reset the virtual machine to its previous state and decided to revisit the problem later.

Monday, July 22, 2024

Seamless Local Control: Integrating WeatherFlow with Home Assistant Across VLANs

I've been pleased with my Home Assistant setup for some time now. One of my main focuses has been achieving local control. This ensures reduced latency for device commands and maintains functionality for state updates and commands even without an internet connection.

I've successfully transitioned many devices to local control using Zigbee, Z-Wave, and ESPHome, but not all integrations have been straightforward. A notable exception has been the WeatherFlow integration for my Tempest weather station.

WeatherFlow offers two types of integrations. The first relies on the cloud, where the weather station sends data to the Tempest cloud service, and the WeatherFlow cloud integration then pulls this data into Home Assistant at intervals.

The second method utilizes the fact that the Tempest weather station broadcasts weather state changes via UDP on the local network. The local WeatherFlow integration in Home Assistant listens for these broadcasts. However, my setup had the Tempest weather station on a different network VLAN than my Home Assistant server. Since UDP broadcasts typically don’t cross VLAN boundaries, this local integration wasn’t working.

I had multiple reasons for placing the Tempest weather station on a separate VLAN. Primarily, the default behavior of sending frequent UDP broadcasts can lead to significant network traffic, especially impacting wireless networks. Additionally, I segment my network for security purposes, preventing devices on the Tempest's VLAN from scanning or connecting to computers on more secure VLANs.

Friday, April 5, 2024

Empowering Your Home's Power Protection: A Deep Dive into UPS Monitoring and Integration

Our household relies on several Uninterruptible Power Supplies (UPSs) to safeguard our network equipment and computers. A crucial aspect of maintaining these UPSs is monitoring their batteries to determine if they need replacement.

For UPSs located near desktop PCs, monitoring battery status is straightforward. These UPSs can typically be connected via USB, allowing us to use monitoring software to check battery health.

However, monitoring UPSs situated in network racks is more complex. Some UPSs only offer serial or USB ports, requiring a computer to directly connect and retrieve battery status. Alternatively, certain UPSs feature a network port and cloud connectivity, enabling them to upload status data to the cloud for remote viewing.

We have an APC UPS with cloud connectivity, which facilitates notifications for significant status changes through their Smart Connect service. Despite its benefits, this solution has drawbacks for our specific needs. Firstly, there's no integration with Home Assistant, preventing us from automating devices based on UPS status, such as shutting down devices during power outages when battery levels drop below a certain threshold. Secondly, reliance on a cloud connection means that if our internet goes down, the automations wouldn't function.

Friday, March 1, 2024

Dazzling DIY Hexagonal LED Accent: A Budget-Friendly Alternative to Nanoleaf Lights with WLED Magic!

I recently completed a wood hexagonal accent piece with LED backlighting for my office. My inspiration was the Nanoleaf hex lights, but I aimed to achieve a similar look without incurring the high cost associated with Nanoleaf lights. Additionally, I saw this as an opportunity to explore and learn about WLED.

To start, I sourced hexagonal wood panels in multiple tones. I deliberately chose multiple-tone panels to ensure the accent piece looked appealing even when the lights were off.

Unlike Nanoleaf panels, my wooden panels don't allow light to shine through. Therefore, I planned to position the LEDs to shine out the top, bottom, and sides of the panels. This necessitated offsetting the panels from the wall to provide space for mounting the LED strips behind the hex panels.

Saturday, February 24, 2024

Cracking the Code: Navigating Network Nightmares with Home Assistant, LibreNMS, and Wireshark

Introduction:

Hey there! Ever found yourself scratching your head over a quirky network issue that just won't quit? I recently had my fair share of head-scratching moments when network broadcast storms started causing serious disruptions in our switches and wireless access points. In this post, I'm breaking down the steps I took to unravel this persistent, network mystery.

Setting the Scene:

Picture this – network switches and access points dropping off the radar every few nights. To get to the bottom of it, I needed to gather some intel without losing sleep, especially as these problems seemed to occur in the middle of the night.  First move? Configuring Home Assistant to ping, with the Ping integration, a crucial switch and give me a notification on my phone when things go south. It became my silent night watchman, marking the time when the broadcast storm kicked in.

The Quest for Network Clarity:

LibreNMS, a network monitoring system, was my next stop. Although it did show spikes in network bandwidth, the specifics were elusive. SNMP logs lacked the juicy details needed for a deep investigation.

Enter rsyslogd:

To beef up my data game, I brought in rsyslogd on a Proxmox server. This Linux container was configured to capture logs from the admin VLAN, where switches and access points were. This did capture a lot of data, however, drowning in logs was not my idea of fun.  It was too hard to find the root cause of these issues.

Saturday, September 16, 2023

Revolutionizing Air Quality Monitoring: How I Upgraded Our System with Mila Integration for Smart Home Automation

In this blog post, I explained how I set up an air quality monitoring system for our neighborhood. With this setup, we can keep an eye on the air quality outside our home. However, this monitoring system is somewhat passive because I need to manually check the air quality and take actions accordingly, such as turning on the HVAC fan to filter and circulate the indoor air.

I considered using the standard Home Assistant integration for Purple Air, but it shares the same drawback as the Magic Mirror integration in terms of API usage limitations. I wanted to avoid an integration that might eventually become unreliable due to API quota limits.

Recently, we purchased Mila connected air filters. These filters not only measure the air quality in the rooms where they're installed but also allow you to select a sensor for neighborhood air quality in the Mila application. Within a month of setting up our Purple Air monitor, I was able to choose it as the neighborhood air quality sensor in the Mila application. This feature enables the Mila filters to determine the relative differences in air quality between the indoors and outdoors.

Thursday, August 24, 2023

Unleashing Home Automation Magic: From Zigzagging with SkyConnect to Soaring with Hubitat

In a previous blog entry, I delved into the fascinating realm of leveraging SkyConnect to interconnect my Zigbee devices with my home automation system. While it seemed like a walk in the park to incorporate Zigbee devices into my Home Assistant setup, I'm here to shed light on some rather unfortunate downsides that cropped up during this experiment.

The crux of the issue lay in the somewhat petite antenna housed within the SkyConnect. This pint-sized component led to a rather finicky connection experience with my Zigbee devices. You wouldn't believe the number of times my sensors and switches decided to take an impromptu leave of absence from the Zigbee network. The result? Automation hiccupped, leaving me high and dry without the expected triggers. And on those rare occasions when triggers managed to sneak through, the devices decided to play hard to control.

Now, let's talk about compatibility woes. The SkyConnect supports just Zigbee and Thread protocols. That might not be a deal-breaker, but here's the rub: I've got a fair share of Z-Wave devices I'm not ready to part with. The grand plan was to simplify my smart home's intricate web, and adding yet another system into the mix for handling the Z-Wave network just didn't tickle my fancy. One system to connect the low-powered wireless devices—that was the dream.

But wait, there's more! Compatibility gremlins struck again. A number of devices I attempted to pair with the SkyConnect ended up being flaky, where they periodically dropped off the network. It's like the functionalities were playing a game of hide and seek. Here's the kicker—I yearned for a system where either the company had its act together or a thriving community would come to the rescue, waving magic wands in the form of drivers to unlock those missing functions.

Introducing Hubitat

Now, hold onto your seats, because after some serious deep diving, I stumbled upon a hero in the home automation arena—Hubitat. Picture this: an automation hub that flaunts wireless radios tuned in to not just Zigbee, but also Z-Wave and a bunch of other protocols. Say adios to the single-protocol constraint; Hubitat had my attention.

Thursday, May 25, 2023

Lighting the Way: Discover the Reliability and Versatility of Lutron Caseta for Your Smart Home Ambiance

Today, we're shining a light on Lutron Caseta, an exceptional lighting control system that combines reliability and versatility to elevate your home's ambiance. In this post, we'll delve into the benefits of using Lutron Caseta, with a particular focus on its rock-solid performance and seamless integration capabilities.

Reliability Redefined

When it comes to lighting control, reliability is non-negotiable. That's where Lutron Caseta takes center stage, wowing users with its unwavering dependability. Lutron achieves this feat through its ingenious use of the Clear Connect RF wireless protocol, operating at a frequency of 434 MHz. This well-thought-out frequency selection ensures a robust connection that remains impervious to interference from pesky Wi-Fi routers or temperamental microwaves, granting you uninterrupted command over your lights.

However, like any superhero, Lutron Caseta does have its limitations. The Clear Connect RF wireless protocol lacks mesh functionality, resulting in a range that extends up to a modest 30 feet. Fear not, though, for Lutron has your back! They offer a handy repeater that works wonders in doubling the range of your wireless protocol. So, should you ever encounter connectivity conundrums, simply deploy this repeater to expand the reach of your Caseta system.

Wednesday, May 24, 2023

SimpliSafe: Revolutionizing Home Security and Automation with Seamless Integration into Home Assistant

In this review, we'll delve into the world of SimpliSafe, a monitored home alarm system that combines reliable wireless technology with seamless integration into popular home automation systems like Home Assistant. Join us as we explore the cutting-edge features of SimpliSafe and discover the exciting possibilities it brings to your smart home.

Below we have included information about getting a discount on a new system, including a free indoor camera.

Cutting-Edge Wireless Technology

SimpliSafe sets itself apart with its innovative use of sub-1GHz radio frequency, enabling seamless communication between sensors and the base station. This wireless technology not only ensures a robust and reliable connection throughout your entire home but also provides an impressive battery life for the sensors. Forget about the hassle of complex wiring—SimpliSafe allows you to place sensors wherever you need them without compromising on performance.

Integration Made Easy

We understand the importance of effortless integration within a home automation ecosystem. SimpliSafe excels in this aspect, seamlessly connecting with Home Assistant—a popular choice among smart home enthusiasts. The setup process, while requiring attention to detail, is straightforward. Just follow the provided instructions, including copying the authentication code from the HTML of a successful authentication attempt, and your SimpliSafe system will become an integral part of your Home Assistant integration.

Sunday, March 5, 2023

Secure Remote Access Made Simple: Explore the Benefits of Telebit.cloud


I am always interested in trying different services that I can run in our home.  For example, we have a VM running Minecraft server, and one running our Home Assistant instance.  One of the challenges is some of these services require ports to be forwarded in the router for the network.  This can add a maintenance cost, as it is important to remove unused port forwarding.  I looked into some alternative mechanisms for setting this up.

Telebit.cloud is a cloud-based solution that enables secure remote access to your devices, networks, and applications. This platform offers a reliable and secure way to connect to your resources from anywhere, at any time, and on any device. Let's take a closer look at what Telebit.cloud is, how it works, and some of the key benefits it offers.

Telebit.cloud is a remote access solution that provides secure connections between your device and the remote resources you want to access. The platform uses advanced encryption and authentication technologies to ensure that your data and connections are always protected. This makes it an excellent choice for individuals and businesses that require remote access to their resources for personal or work purposes.

Monday, February 20, 2023

Say Goodbye to Bathroom Humidity: How to Automate Your Exhaust Fan with Home Assistant and a Humidity Sensor


Bathrooms are one of the most frequently used rooms in any home. But did you know that all that moisture from your shower can wreak havoc on your bathroom and even lead to mold growth? That's why having a good ventilation system is crucial, and a bathroom exhaust fan is a crucial component.

In this post, we're going to show you how to automate your bathroom exhaust fan using a home automation system, like Home Assistant, and a humidity sensor. Not only will this keep your bathroom dry and fresh, but it'll also save you energy and money.

Here's what you'll need:

Step 1: Install the Humidity Sensor

First things first, install the humidity sensor in your bathroom. Put it in a location where it can accurately measure the humidity level in the room. You can mount it on the wall or place it on a shelf. Then, connect the humidity sensor to your home automation system by following the manufacturer's instructions.

Step 2: Install the Smart Switch

Next, install the smart switch that will control your bathroom exhaust fan. You can pick any compatible switch that works with your home automation system. We suggest the Enbrighten Smart Switch because it's simple to set up.

Follow the manufacturer's instructions to install the switch, and make sure to connect it to your home automation system.

Monday, February 13, 2023

Simplify Your Smart Home: Control Your Devices with Just a Press of a Button with the Flic Hub and Flic Buttons

Are you tired of having to grab your phone every time you want to control a smart device in your home? The Flic Hub and Flic Buttons offer a simple solution that allows you to control your smart home with just the press of a button.

The Flic buttons use Bluetooth to communicate with your smartphone, meaning you can trigger actions such as turning on the lights or adjusting the thermostat with just a press of the button. This is great when you are home and need to control your smart devices. But the real magic of the Flic system enables this functionality when your phone isn't around.

The Flic Hub is a compact wireless hub that acts as a bridge between your Flic buttons and your smart devices. It connects to your home's Wi-Fi or Ethernet network and can support up to 63 Flic buttons, making it possible to control multiple devices with just a few presses. And because the Flic Hub doesn't rely on your phone, you can control your smart home even when your phone isn't there.

The Flic buttons come in a variety of colors and can be customized to perform different functions. You can stick them to a wall, wear them as a wristband, or place them anywhere else for easy access. Using the buttons is simple: press once for one function, press twice for another function, or hold down for a third function.

Saturday, February 4, 2023

Making Your Home Automation Work for You and Your Guests: A Guide to Smart Home Guest Management

Home automation is a fantastic way to make your home more comfortable and reduce the amount of manual work you need to do. Automating your lights, locks, and other devices can be a great time-saver, but sometimes things can go wrong when your schedule changes. One such example is when you have house guests, who can throw off the regular routines in your home and cause helpful automations to become disruptive.

In this blog post, we will cover the current setup in our home and the adjustments we made to our home automation to better handle house guests. We will discuss the changes made to our Google Assistant routine and Roomba vacuum schedule and provide examples of how to make similar adjustments in your home.

Current Setup:

In our home, we use a Google Assistant routine to say "Good night" and turn off the lights around the house, and lock the doors. This works well when the schedule in the house is regular, but when things change, such as having guests over, it can cause problems. For example, the routine would normally turn off the lights in the guest room, but when guests are staying over, this can be quite disruptive as the lights and fan could turn off unexpectedly.

Another issue we faced was with our Roomba vacuum, which would vacuum the downstairs at night, including the guest room. When guests are staying over and the guest room door is closed, the vacuum would bang against the door at night, causing discomfort to the guests.

Adjusting the Home Automation for Guests:

To better handle having house guests over, we made some adjustments to our home automation setup. The first thing we did was create a toggle helper, in Home Assistant, that would represent when the guest room is occupied at night. With this helper, we made the following adjustments to our home automations:

Saturday, January 28, 2023

Say Goodbye to Wrinkled Clothes and Musty Smells: How Notifications Can Streamline Your Laundry Routine


When it comes to laundry, there's nothing more frustrating than pulling out a basket full of wrinkled clothes and musty-smelling linens. It can make all of your hard work feel like it was for nothing, and who has time for that? But, what if I told you there's a simple solution to this problem? By generating notifications when your washing machine and dryer have completed their cycles, you can minimize wrinkles and prevent musty smells in your clothes, making your laundry day a little less painful.

Let's start with the type of notification you want to receive. Some people prefer text messages or emails, while others prefer push notifications on their phone or smartwatch. I personally prefer audio prompts on the smart speakers in the house.  This works well, even when I don't have my phone on me, and it also is useful for others (read kids) in the house to move their clothes to the next steps in the process.

I have tried several ways to trigger these notifications.  At first, I figured I could use the fact that the washing machine and dryer vibrated when the cycles ran, to trigger the notification when the vibration stopped.  I used some double-sided tape to attach a Multipurpose sensor to the back of both the washer and dryer.  For Home Assistant, I found this blueprint to that performs an action when it detects that shaking stops.  I needed to tweak the automations using this blueprint to make it work for my scenario.  For example, I needed to set the hysteresis both for what it will use to consider the cycle having been started, and when the cycle has finished. Unfortunately, this does mean that there is a delay between when the cycle has finished to when the notification is generated.

For an unrelated reason, we replaced our washer and dryer with appliances that support LG's ThinQ.  These appliances are WiFi connected, and when configured to their cloud service, mobile phone notifications can be generated when cycles complete.  Since I want to have the notifications spoken over our smart speakers, I needed to figure out how to connect these devices to my Home Assistant setup.  I found this custom integration that integrates with various LG ThinQ devices.  Once paired, the washer and dryer, and their corresponding states, are represented in Home Assistant.  I am now able to trigger automations from state changes from these appliances.

Friday, January 27, 2023

Upgrading to Lennox iComfort S30


If you're looking to upgrade your thermostat, you might be wondering about the differences between the Lennox iComfort WiFi thermostat and the Lennox iComfort S30 thermostat. While both thermostats offer a range of features to help you control and optimize the temperature in your home, there are some key differences between the two that might make one a better choice for you than the other.

One of the main differences between the iComfort WiFi thermostat and the iComfort S30 thermostat is their connectivity options. While both support connecting to your home's WiFi network, the S30 has more connectivity capabilities once connected.  Once connected to your home network, the updated thermostat supports connecting to Amazon Alexa and Google Assistant.  This enables you to use your voice to control your HVAC system.

It can also be integrated with Home Assistant, with this integration.  This integration supports communicating with the S30 over the local network, for fast reliable communication, and via the cloud.  Once integrated with Home Assistant, the thermostat can be made available to voice assistants with the single voice assistant integrations used for Home Assistant, 

Another difference between the two thermostats is the size of their screens. The iComfort WiFi thermostat has a 3.5-inch color touchscreen display, while the iComfort S30 has a 4.3-inch color touchscreen display. The larger, higher resolution screen on the iComfort S30 makes it easier to read and navigate, which can be especially helpful if you have trouble reading small text or navigating small buttons.

Thursday, January 26, 2023

Automate Pathway Night Lights

Home automation is a great way to make your life easier and more convenient. One of the simplest and most practical ways to automate your home is by using motion sensors to turn on your lights at night. In this blog post, we will explore the options available for automating your lights using motion sensors, and provide step-by-step instructions for setting up the system in your home. Whether you want to increase security, save energy, or simply make your home more convenient, automating your lights with motion sensors is a great place to start.

One simple way to automate your lights using motion sensors is to have them turn on to full brightness when motion is detected. However, this type of automation may not be appropriate at night, as it can disturb others in the home.

An alternative approach is to use dimmable lights and a dimmer switch. This way, when motion is detected at night, the lights will turn on to a low setting, providing enough light for navigation without disturbing others. You can also set the lights to turn off after a certain period of time or to turn off when motion is no longer detected.

I have set up several of these automations with Home Assistant.  The following configuration works well for me this automation

Configure Motion Sensor Group

Stairways and hallways connect two different parts of a house.  These areas may not be near so it may necessary for multiple motion sensors to trigger this automation.  For example, a motion sensor at the top and one at the bottom of a flight of stairs.

Home Assistant Group Helper make this very easy to create a group of motion sensor, where if motion is detected on any of the sensors, the group will indicate that motion is sensed. I created a group with motion sensors that should trigger the lights to come on at night

Note: If a single motion sensor is sufficient, this step can be skipped.


Tuesday, January 24, 2023

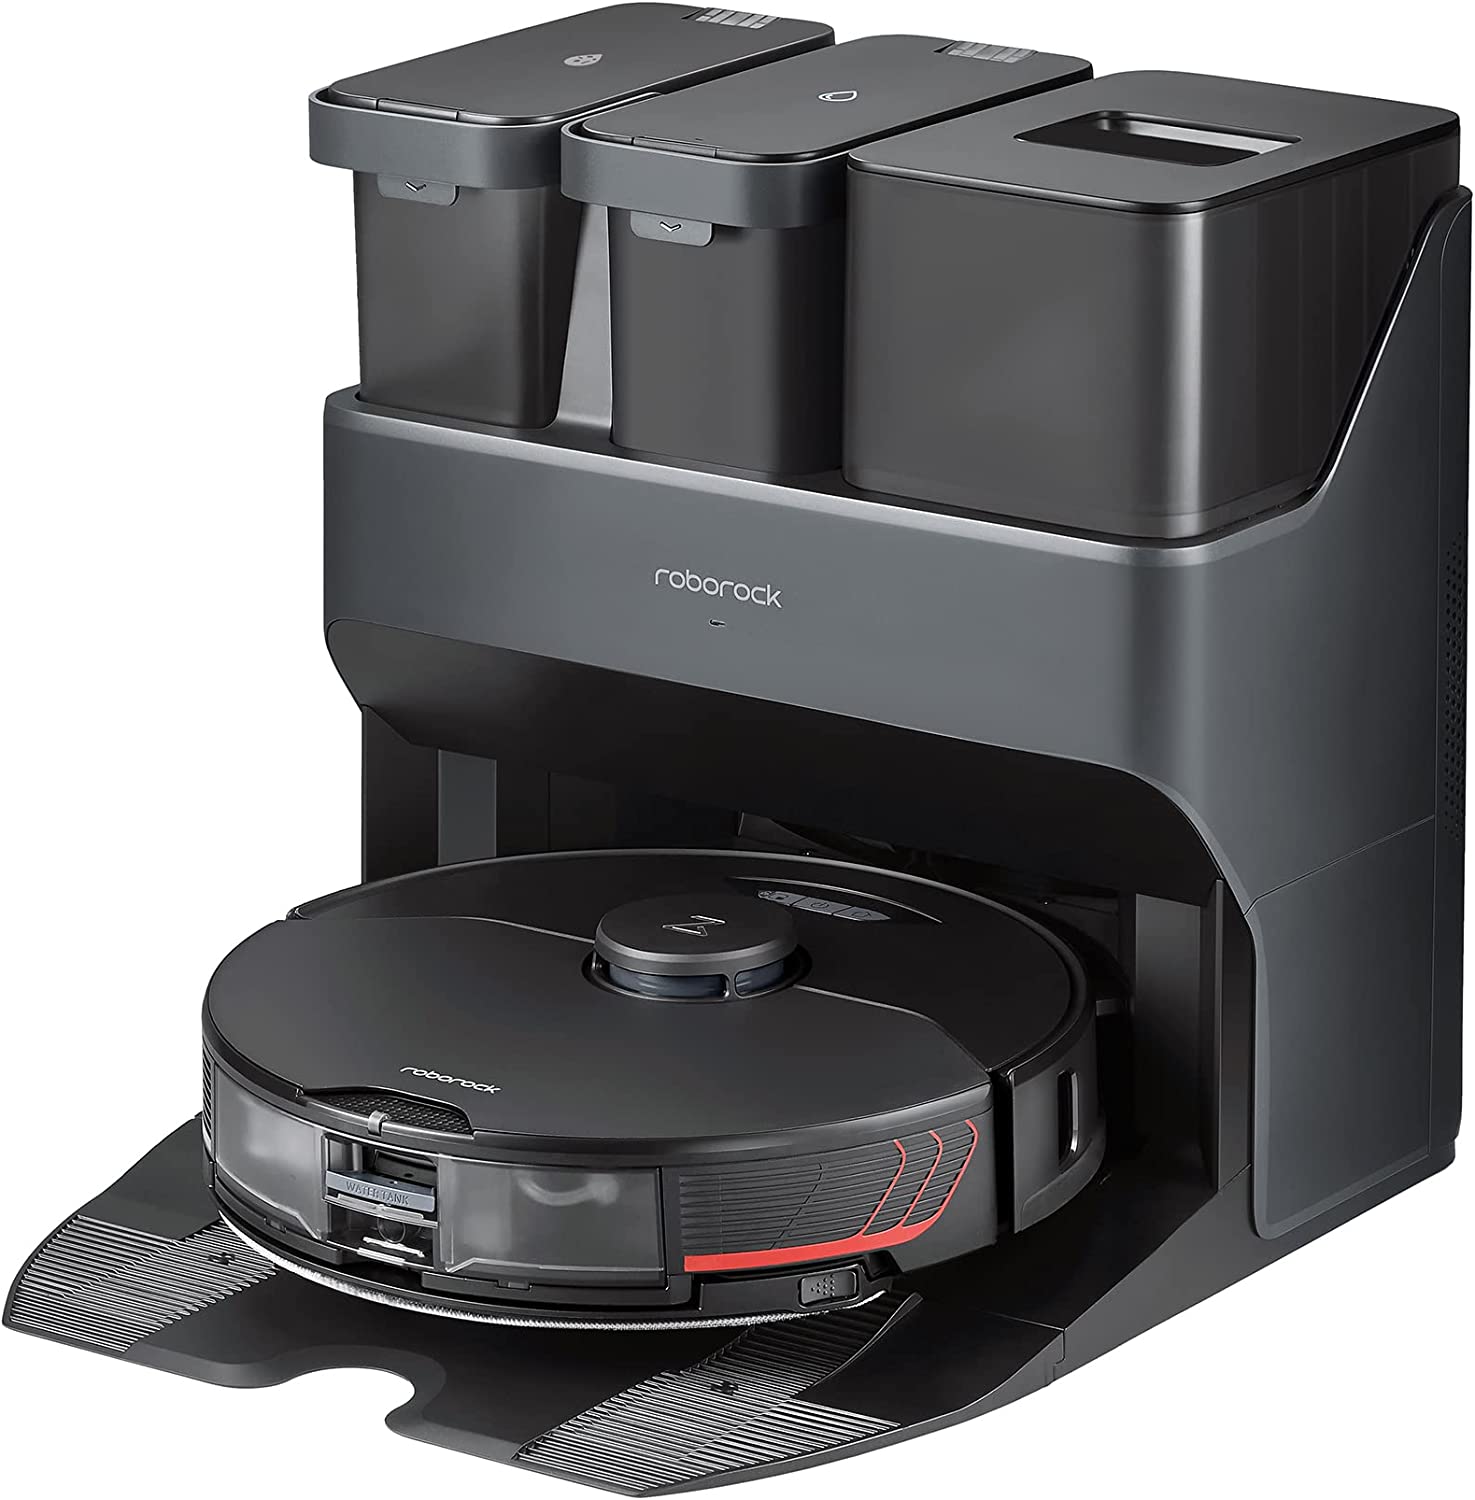
Roborock S7 and Home Assistant Integration


When it comes to keeping your home clean, there's no denying that robotic vacuums have become an increasingly popular option. They're powerful, efficient, and convenient, allowing you to keep your floors spotless with minimal effort on your part. But if you're looking for a robotic vacuum that truly stands out from the rest, then look no further than the Roborock S7 MaxV Ultra Robot Vacuum and Mop.

The Roborock S7 MaxV Ultra is the latest addition to the Roborock family of robotic vacuums, and it's packed with features that are sure to make it one of the best options on the market. The first thing you'll notice about the S7 MaxV is its advanced navigation system. Using laser navigation technology, the S7 MaxV can create a precise map of your home, allowing it to navigate and clean every nook and cranny with ease. It also has advanced obstacle detection, so it can easily avoid furniture and other objects in its path. This means that the S7 MaxV can clean your home more efficiently and thoroughly than many other robotic vacuums.

But the S7 MaxV isn't just good at navigating your home - it's also incredibly powerful. With a suction power of 2000Pa, it can easily pick up dirt, dust, and even pet hair, leaving your floors spotless. And with a high-efficiency filter that captures 99.97% of particles as small as 0.3 microns, it's a great option for homes with allergies and asthma.

Saturday, January 21, 2023

Mailbox Notification Automation


Mailbox theft is a growing concern for many homeowners. Not only can it result in the loss of important mail and packages, but it can also compromise personal information and identity. We have had our mailbox pried open, and have had some packages taken.  The first thing that we did was to replace the mailbox with a stronger locking mailbox.  This makes it harder for people to pry open the box, and it prevents people from reaching their hands in to grab the letters or packages.

But a locking mailbox doesn't completely solve the problem, it just adds barriers to slow potential mail and package thieves.  I also wanted to implement something that would minimize the time that mail remains in the mailbox.  

There are several goals that I wanted to accomplish with these notifications
  1. Generate notifications, on my phone and in the speakers in the house, when new mail is received.
  2. Generate reminder notifications, if new mail has been sitting in the mailbox for too long
  3. Generate notifications, if the mail retrieval door has been left open too long
  4. Turn on the lights in the front of the house (primarily landscape lights) if the mailbox door is opened after midnight.

For these notifications, I needed to determine when the doors, for new mail and the one where the mail is retrieved are opened.  I was able to use two Aeotec SmartThings Multipurpose Sensors to do this.  For the new mail door, I placed the sensor on the right side of the mailbox, where the magnet is mounted to the bottom part of the moving door.


For the mail retreival door, I mounted the sensor on the left side of the mailbox. Since the door has a thick lip, I needed to use some shims to make sure that the sensor aligned with the magnet.


Since these sensors are Zigbee sensors, that rely on RF signals, the metal sides of the mailbox significantly reduced the range for these signals.  The Zigbee controller in the house wasn't able to get data from these sensors.  The mailbox is about 20' from our house, and luckily there is an outlet on the corner near the mailbox.  I added an Enbrighten Zigbee Outdoor Plug-In Switch to my Zigbee network, and plugged it into the outdoor outlet that is closest to the mailbox.  This switch was able to bridge the signals from the sensors in the mailbox to the rest of the network.

With the sensors reporting data, here are the automations that I created

Tuesday, January 10, 2023

Aqara Sensors with Home Assistant


The Aqara Door and Window Sensor and the Aqara Motion Sensor are sensors that can enable automations around the home.  These sensors are particularly interesting, especially since they are much smaller than the SmartThings sensors I have used around the house, so the automation support can be added discretely.

The boxes from the Aqara sensors state that the Aqara hub is required. But since these are Zigbee devices, they can work with Home Assistant, with the Sky Connect USB Zigbee adapter (without the Aqara hub). 


Pairing these with Home Assistant is fairly straightforward.  I was able to use these steps

  1. Enable Home Assistant to scan for new Zigbee devices. 

  2. Remove the battery tab on the sensor, and press and hold the rest button for 3 seconds (This may take several attempts)
  3. When the device is initialized, set a device name and assign the sensor to a room. 

With the possibilities with the larger and devices, it will be interesting to see what automations can be set up.

Thursday, January 5, 2023

Triggering Google Assistant Routines from Home Assistant

Introduction:

If you're like me, you probably love the convenience and automation that smart home devices bring to your daily life. One of the best ways to take advantage of these devices is by setting up routines in your smart home assistant, such as Home Assistant.

What is Home Assistant?

Home Assistant is an open-source smart home platform that allows you to automate and control your home's devices and systems. It supports a wide range of devices and services, including popular smart home products like Google Home, Amazon Echo, and Philips Hue. With Home Assistant, you can easily set up routines to automate tasks and make your home more efficient and convenient.

What are Home Assistant routines?

Home Assistant routines are automated actions that are triggered by certain events or conditions. For example, you can set up a routine to turn off all the lights in your house when you go to bed, or to turn on your coffee maker every morning at 6 am. You can even set up routines to control your thermostat, lock your doors, or turn on your security system. The possibilities are endless!

Home Assistant device support

The support for creating automations of the devices in the home is quite powerful and flexible.  One limitation is that it can only control devices where there are integrations with Home Assistant and have been added to the setup.  Unfortunately, not all devices can be directly integrated into Home Assistant. With the 2023.01 version of Home Assistant, now you can trigger Google Assistant commands from Home Assistant.

Google Assistant Routines

One of the primary use cases I have for this integration is triggering Google Assistant routines from Home Assistant.  Since Home Assistant has support for triggering routines with NFC tags, one example of this is triggering the "Good night" Google Assistant routine, when I put my phone on my bedside table.

Printing Across VLANs: A Secure and Scalable Solution

In my previous configuration, I used a CUPS server with multiple network interfaces to enable printing from computers on restricted networks...